Does your car still have a tape deck? Are you lacking DAB+? Do you long for phone connectivity and streaming music functionality?
If so, you’re going to need to yank out whatever old kit is in your car in favour of something a bit more contemporary, maybe with an Android-based operating system. But this being an electrical item, some of you might not be so keen to take it on. Don’t worry, we have you covered.
Before we get into the actual act of upgrading your car stereo, there are some things to note:
1. We’re looking at standard head-units here that can be removed at home. Sadly, more modern cars are built to only ever have whatever stereo the car is ordered with, as the stereo itself is integral to not only the design of the car, but also to the functionality of the dashboard or other screens.
2. If you’re going to change the radio, always disconnect the battery while you do so. It’s the safest way to approach it – but make sure you know how to reset your car's systems (electric windows, for example). Your Haynes manual will go into detail about how to do this.
Removing and replacing your car radio
Do you want some pumping bass rhythms in your car? Of course you do. But how do you remove and replace your existing radio? Read on and we’ll guide you to the phat bass…
1 Car stereo pins
Many stereos require removal tools – known as car stereo removal pins or keys – to come away from the dash.
Happily, the internet or aftermarket suppliers such as Autobarn will be able to supply you with the pins need to get the factory head unit out.
Simply insert the pins and push them together or away from each other (depends on the car) and then pull them forward, the radio should come free.
2 Unplug the stereo
Simple as it sounds – there will be a plug connector going into the back of the radio. Unplug this, then the radio is free of the car completely.
3 Fit the DAB+ aerial
If you're upgrading to a digital radio you'll need to install a new aerial because your old stereo's aerial is designed to pick up analogue signals. Fortunately, you should be able to get away with a window-mounted DAB+ aerial, with the wiring tucked behind the A-pillar (or C-pillar if you're attaching it to the rear screen) trim and fed under the rest of the trim to the dashboard.
4 Car stereo connections
Hopefully you’ll be presented with a standard ISO connection, into the back of which there is logical wiring (red – live, black – ground, etc). If this isn’t the case, you’re going to need to buy a specialist car stereo wiring harness. You can plug the car’s harness into it, and then the new one goes into the radio.
5 No cutting
Unless the car had no radio fitted to begin with, don’t go cutting wires and splicing stuff in. This is a deeply unsafe way to approach it. Unless you own something truly unique, there will be a harness adaptor out there that fits it. This is simple and above all, it’s safe.
6 Fit the car stereo cage
If your car is a standard single DIN (letterbox shape), then you just need to fit the cage into which your new radio will go. You’ll have to remove the old cage first (don’t be tempted to use it, you’ll just end up permanently wedging your new stereo in the car), then fit the new one. Using a screwdriver, bend down the internal metal prongs on the cage to secure it.
If you have a car like a Mk1 Focus, or Saab or something that has a large radio face, you’ll again need to go shopping. Happily, though, you can buy adaptor facias for most common cars, so your new radio will look right at home.
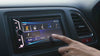
7 Plug in the radio
Before fitting it into the car, plug the radio in and check it functions. Some cars might need you to swap the live and ignition live wired around. Handily, most new stereos come with a harness that has a plug on the red live and yellow ignition live wires so you can swap them around if needs be.
8 Fit the car radio
Push the radio into the new cage until it clicks. Do not force it. Make sure no wires are caught. Also, don’t forget to connect the aerial.
9 Fit the surround and faceplate
Fit the surround and the stereo face, and then that’s it, the hard part is done. Now you just have to consult the manual for your chosen stereo so you can connect your phone etc.