What to know how to change the transmission fluid in your 1987-2017 Jeep Wrangler? All Haynes Digital Online Manuals feature everything you love about our books in an instantly accessible digital online form, that you can use via any device with an internet connection.
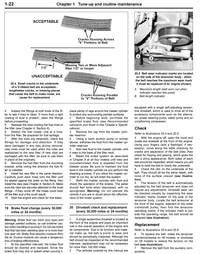
This page is taken directly from our online manual 50030 covering Wranglers with 4 cylinder, V6, and inline 6 cylinder engines. The 3 speed Torqueflite 904/30RH and 999/32RH, 4 speed Ultradrive 42RLE, and 5 speed NAG1/5G-Tronic are very different transmissions, but they are similar in all having a pan on the bottom with a filter inside of it. We recommend changing the fluid after approximately 30,000 miles or 2 years.
At the specified time intervals, Haynes reccomends 30,000 miles or 2 years, the transmission fluid should be drained and replaced. Since the fluid will remain hot for hours after driving, perform this procedure only after the engine has cooled down completely.
Before beginning work, purchase the 4 quarts of the specified transmission fluid and a new filter.
1987-2000 Jeep Wrangler Mopar ATF Plus +3 type 7126 or equivalant
2001 and later Jeep Wrangler Mopar ATF Plus +4 type 9602 or equivalentOther tools necessary for this job include jackstands to support the vehicle in a raised position, a drain pan capable of holding at least eight pints, newspapers and clean rags.
Raise the vehicle with a proper floor jack (not the spare tire jack) and support it securely on jack stands.
With a drain pan in place, remove the rear and side transmission pan mounting bolts.
Note: On the Ultradrive 42RLE transmission, take notice of the pan bolt that has a sealant patch on it. Set aside this bolt for reuse and mark the bolt hole that you removed it from, typically the second from the front on the left side.
- Loosen the front pan bolts approximately one turn and fluid should start to drain from the rear of the pan
- If the pan does not loosen and fluid does not come out, carefully pry the transmission pan loose with a putty knife.

- Remove the remaining bolts, pan and gasket. Carefully clean the gasket surface of the transmission to remove all traces of the old gasket and sealant.
- Drain the fluid from the transmission pan, clean it with solvent and dry it with compressed air.
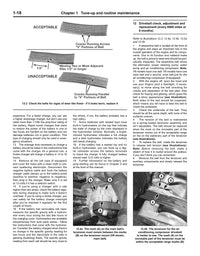
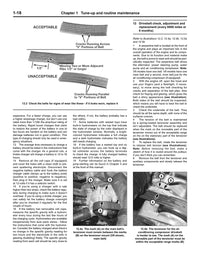
- (See illustration) Remove the filter from the transmission valve body (see illustration). Earlier models are held on with three bolts, while later models simply press into an o-ring.
The automatic transmission fluid filter on earlier 3 and 4-speed models is held in place by three screws. On later 5-speed NAG1 models the filter pulls straight out of the valve body.

- Install a new filter with new O-ring or gasket if provided.
- Make sure the gasket surface on the transmission pan is clean and dry, then install a new pan gasket. Put the pan in place against the transmission and, working around the pan, finger tighten each bolt, then tighten a little at a time until the final torque figure is reached to avoid warping the pan. On 2007 through 2011 models, clean the adhesive-coated bolt (2nd from the front on the left) and apply new adhesive sealant.
Automatic Transmission Pan Bolts 15 ft-lbs - Lower the vehicle and add the specified amount of automatic transmission fluid through the filler/dipstick tube. Expect to need about 4 quarts, but do not overfill.
- With the transmission in Park and the parking brake set, run the engine at a fast idle for a minute, but don’t race it.
- With your foot on the brake, move the gear selector to each gear for a second, then back to Neutral (for the 2012 and later 5-speed NAG1 transmission, check the level in Park). Check the fluid level.
Note: To check the transmission fluid level on 2012 and later models with the NAG1 transmission, and models with the 42RLE transmission but no dipstick, a special dipstick (part no. 9336A) will be required. It can be purchased from many auto parts stores, or online. A tool can be fabricated from a wire coat hanger or similar; it must be long enough to go into the dipstick/filler tube and contact the bottom of the transmission fluid pan without falling in.
Also, an OBDII scan tool should be used to measure the temperature of the transmission fluid. If a scan tool is unavailable, an infrared heat gun pointed at the transmission fluid pan can give the approximate temperature. The fluid level should be measured with it between 80 and 200 degrees Fahrenheit (see charts).
On models with a dipstick, it will be near the firewall on the driver's side. On models without a dipstick, remove this cap from the filler tube and check the fluid level with tool no. 9336A or equivalent.

Automatic transmission fluid level-to-temperature chart - later models with Ultradrive 42RLE 4-speed automatic transmission and no dipstick. Measurement taken from bottom of pan/end of tool.
(click to enlarge)

Automatic transmission fluid level-to-temperature chart - 2012 and up 5-speed NAG1 automatic transmission. Measurement taken from bottom of pan/end of tool.
(click to enlarge)

- Check under the vehicle for transmission fluid leaks during the first few trips, and check the fluid level after a week.
This video is a general overview of changing the transmission fluid on the typical vehicle. Much of it applies to the Jeep Wrangler, no matter if you have a 3, 4 or 5-speed automatic transmission, but it is meant merely as a supplement to the above instructions.


