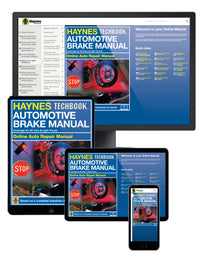
All Haynes Digital Online Manuals feature everything you love about our books in an instantly accessible digital online form, that you can use via any device with an internet connection.
The 2001-2011 Honda Civic and 2002-2011 Honda CR-V with 1.7L, 1.8L, 2.0L or 2.4L engines have a schedule for when the drive axle CV joint or CV boot is likely to start to fail, but you should check for play, leaks, and torn or cracked rubber boots any time you are under the car. Simply follow the relevant procedures in our digital online manual 42026. Your periodic oil change and tire rotation is a great time to look at the CV joints for wear, and if your CR-V is all-wheel drive, then be sure to check the rear axle as well. Here is a simple guide to checking them: Checking and Maintaining CV Joint Boots.
Note: The manufacturer recommends you replace the axle nut and stabilizer bar end link nut with new fasteners whenever you remove them
How to remove and replace a Honda Civic 2001-2010 drive axle
Note: This video was made based on the Honda Civic, but the CR-V is largely the same. Any significant differences will be noted in the text instructions.
Front
Removal
Loosen the front wheel lug nuts, raise the vehicle and support it securely on jack stands. Remove the wheel.
(See illustration) Unstake the drive axle/hub nut with a punch or chisel
In order to keep the axle nut from loosening it is deformed to fit the notch in the end of the axle, or staked. Use a punch or chisel and unstake the drive axle/hub nut, or hammer out the edge so it can be turned.

- (See illustration) Loosen the drive axle/hub nut with a large socket and breaker bar, then remove the drive axle/hub nut from the axle and discard it.
To prevent the hub from turning while you’re loosening the drive axle/hub nut, wedge a pry bar between two of the wheel studs. Or you can wedge a punch against the brake caliper inserted in the edge of the brake rotor.

- Separate the lower control arm from the steering knuckle as shown in the video (Full details are in the Haynes manual Chapter 10).
Remove the cotter pin from the castle nut and loosen, but do not remove the nut. Use a ball joint press to remove the ball joint from the lower control arm.
Counterhold the stabilizer bar end link with a allen wrench and remove the nut. Disconnect the end link from the control arm - Swing the knuckle/hub assembly out (away from the vehicle) until the end of the drive axle is free of the hub.
Note: If the drive axle splines stick in the hub, tap on the end of the drive axle with a plastic hammer.
Support the outer end of the drive axle with a piece of wire to avoid unnecessary strain on the inner CV joint. - (See illustrations) Pry the inner CV joint out of the transaxle (or, on models so equipped, the intermediate shaft) using a large screwdriver or pry bar.
Note: Some fluid may leak out of the transaxle when you remove the inner CV joint. Have rags or a drain pan handy.
Use a large screwdriver or a prybar to pop the inner end of the driveaxle from the transaxle, or . . .

. . . if you’re removing a drive axle from a vehicle equipped with an intermediate shaft, insert the pry bar between the intermediate shaft bearing and the drive axle to pop it loose

- Support the CV joints and carefully remove the drive axle from the vehicle.
Installation
- (See illustrations) Pry the old spring clip from the inner end of the drive axle (or, on models so equipped, the outer end of the intermediate shaft) and install a new one.
Pry the old spring clip from the inner end of the drive axle with a small screwdriver or awl.

To install the new spring clip, start one end in the groove and work the clip over the shaft end, into the groove

- Installation is the reverse of removal, but with the following additional points:
- Remove the old set-ring from the drive axle or intermediate shaft (depending on which model you’re working on) and install a new one.
- Apply a film of multi-purpose grease around the splines of the joints.
- When installing the drive axle, hold the drive axle straight out, then push it in sharply to seat the drive axle set-ring.
- Clean all foreign matter from the drive axle outer CV joint threads and coat the splines with multi-purpose grease. Guide the drive axle into the hub splines and install the new drive axle/hub nut.
Tighten the nut securely but not to the specified torque at this time. - Reconnect the control arm, then tighten the suspension fasteners to the proper torque:
Ball joint castle nut 43-51 ft-lbs
Stabilizer bar link nuts
Civic 2001-2005 29 ft-lbs
Civic 2006-2010 25 ft-lbs
CR-V 2002-2006 29 ft-lbs
CR-V 2007-2011 58 ft-lbs - Install the wheel and lug nuts, then lower the vehicle.
- Tighten the drive axle/hub nut to the proper torque:
Civic (All but 2006-2010 Civic Si) 134 ft-lbs
Civic Si 2006-2010 181 ft-lbs
CR-V 2002-2006 181 ft-lbs
CR-V 2007-2011 242 ft-lbs
(See procedure below for CR-V rear specifics) - Tighten the wheel lug nuts to the proper torque:
All models 80 ft-lbs - Add transaxle lubricant if it was drained or if any fluid spilled out.
Intermediate Shaft
Removal
Note: Steps 10-15 for removing the axle connected to the intermediate shaft are the same as step 1-5 above
Remove the intermediate shaft heat shield mounting bolts, then remove the heat shield.
Remove the bearing support mounting bolts and slide the intermediate shaft out of the transaxle. Be careful not to damage the transaxle seal when pulling the shaft out.
Check the support bearing for smooth operation by turning the shaft while holding the bearing. If you feel any roughness, take the intermediate shaft to an automotive machine shop or other qualified repair facility to have a new bearing installed.
Installation
Lubricate the lips of the transaxle seal with multi-purpose grease. Carefully guide the intermediate shaft into the transaxle side gear then install the mounting nuts for the bearing support. Tighten the nuts to the proper torque:
Intermediate shaft bearing support bolts 29 ft-lbsThe remainder of installation is the reverse of removal.
Rear (AWD CR-V models)
Removal
Remove the wheel cover or hub cap. Unstake the drive axle/hub nut with a punch or chisel (see illustration above), then break the hub nut loose with a socket and large breaker bar.
Block the front wheels to prevent the vehicle from rolling. Loosen the wheel lug nuts, raise the rear of the vehicle and support it securely on jack stands. Remove the wheel.
Remove the drive axle/hub nut from the axle and discard it.
Detach the trailing arm from the knuckle (full instructions are in the Haynes manual Chapter 10 ), then pry the knuckle outward and remove the outer end of the drive axle from the hub.
Caution: Don’t let the drive axle hang by the inner CV joint.Place a drain pan under the rear differential. Pry the inner end of the drive axle out of the differential and remove it from the vehicle.
Installation
- Pry the old spring clip from the inner end of the drive axle and install a new one (see illustrations above).
- Apply a light film of grease to the area on the inner CV joint stub shaft where the seal rides, then insert the splined end of the inner CV joint into the differential. Make sure the spring clip locks in its groove.
- Apply a light film of grease to the outer CV joint splines, pry the trailing arm outward and insert the outer end of the drive axle into the hub.
- Connect the trailing arm to the knuckle and install the bolts. Using a floor jack, raise the trailing arm to simulate normal ride height, then tighten the bolt to the proper torque:
Trailing arm to knuckle bolt 43 ft-lbs - Install a new drive axle/hub nut. Tighten the hub nut securely, but don’t try to tighten it to the actual torque specification until you’ve lowered the vehicle to the ground.
- Install the wheel and lug nuts, then lower the vehicle. Tighten the lug nuts to the proper torque:
Wheel lug nuts 80 ft-lbs - Tighten the drive axle/hub nut to the proper torque listed below , then, using a hammer and a punch, stake the collar of the nut into the slot in the drive axle. Install the wheel cover or hub cap.
Rear axle hub nut
2002-2006 CR-V 134 ft-lbs
2007-2011 CR-V 181 ft-lbs - Check the differential lubricant, adding as necessary to bring it to the appropriate level.
