
All Haynes Digital Online Manuals are currently 50% off. They feature everything you love about our books in an instantly accessible digital online form, that you can use via any device with an internet connection.
This page is taken directly from our online manual 24067 for the 2007-2013 Chevy Silverado/GMC Sierra 1500, 2500 & 3500, Chevy Tahoe and Suburban, and GMC Yukon, Yukon Denali, and Yukon XL. It will guide you to replacing the brake pads on the front or rear of the Chevy Silverado and GMC Sierra 1500, 2500, and 3500, as well as the Chevy Tahoe and Suburban, and GMC Yukon, Yukon XL, and Yukon Denali.
- Remove the cap from the brake fluid reservoir. Remove about two-thirds of the fluid from the reservoir, then reinstall the cap. Caution: Brake fluid will damage paint. If any fluid is spilled, wash it off immediately with plenty of clean, cold water.
-
Loosen the front or rear wheel lug nuts, raise the front or rear of the vehicle and support it securely on jackstands. Block the wheels at the opposite end.
-
Remove the wheels. Work on one brake assembly at a time, using the assembled brake for reference if necessary.
-
Inspect the brake disc carefully as outlined in Section 5 of the manual (Look for grooves and cracks. Measure that thickness is within specificication). If machining or replacement is necessary, follow the information in that Section to remove the disc.
- Follow the accompanying photo sequence for the actual pad replacement procedure (see illustrations 3.5a through 3.5m) . Be sure to stay in order and read the caption under each illustration.
Illustration 3.5a - Before disassembling the brake, wash it thoroughly with brake system cleaner and allow it to dry - position a drain pan under the brake to catch the residue - DO NOT use compressed air to blow off brake dust!
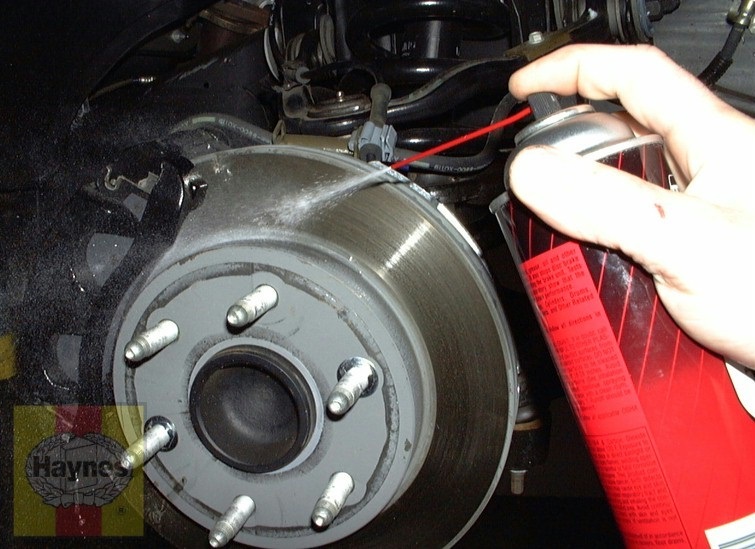
Illustration 3.5b - To make room for the new pads, use a C-clamp to depress the piston(s) into the caliper before removing the caliper and pads - do this a little at a time, keeping an eye on the fluid level in the master cylinder to make sure it doesn’t overflow.
Note: It’s a good idea to loosen the bleed screw and allow the brake fluid to exit the caliper while compressing the caliper pistons. This step will keep any debris and sediment that may be in the calipers from contaminating the ABS Electro-Hydraulic Control Unit (EHCU) and keep the master cylinder from overflowing
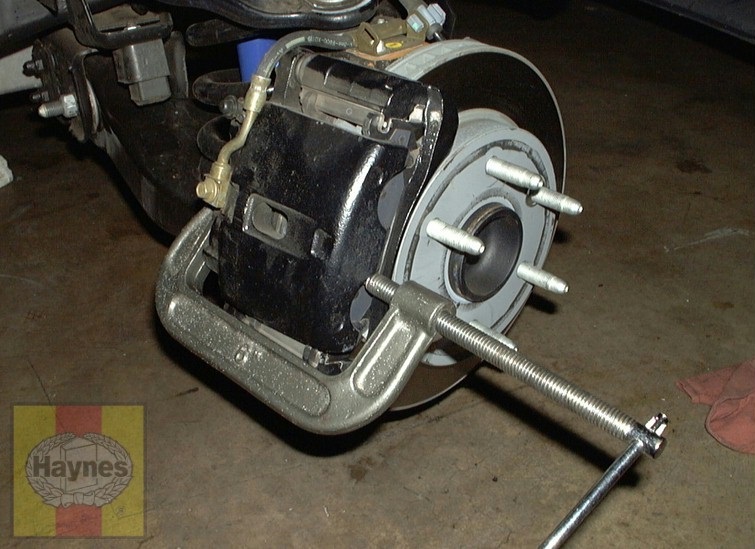
Illustration 3.5c - Front caliper mounting details. A - Caliper mounting bolts. B - Brake hose inlet fitting (banjo) bolt. C - Caliper mounting bracket bolts

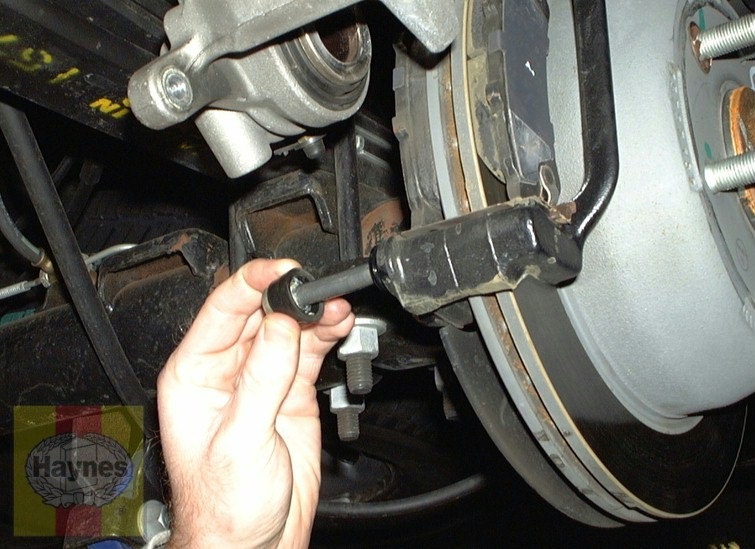
Illustration 3.5d - If you’re replacing the front brake pads or the rear pads on 2500 and 3500 models, remove the lower mounting bolt and pivot the caliper up, supporting it in this position with a piece of wire
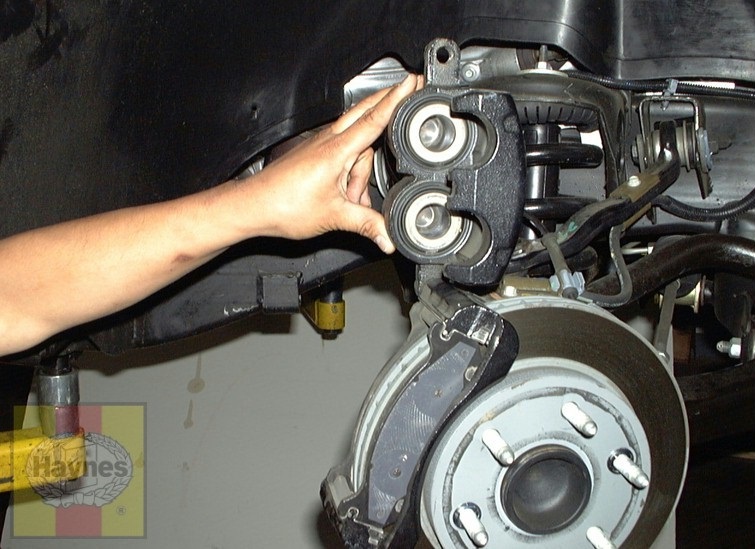
Illustration 3.5e - If you’re replacing the front or rear pads on a 1500 model, hold the caliper slide pin with an open-end wrench, loosen the lower mounting bolt with another wrench, then pivot the caliper up and support it in this position for access to the brake pads
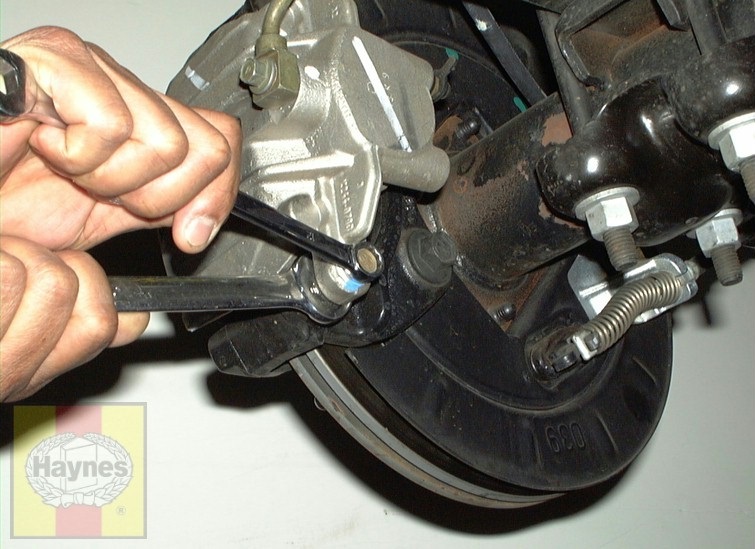
Illustration 3.5f - Remove the inner brake pad from the caliper mounting bracket.
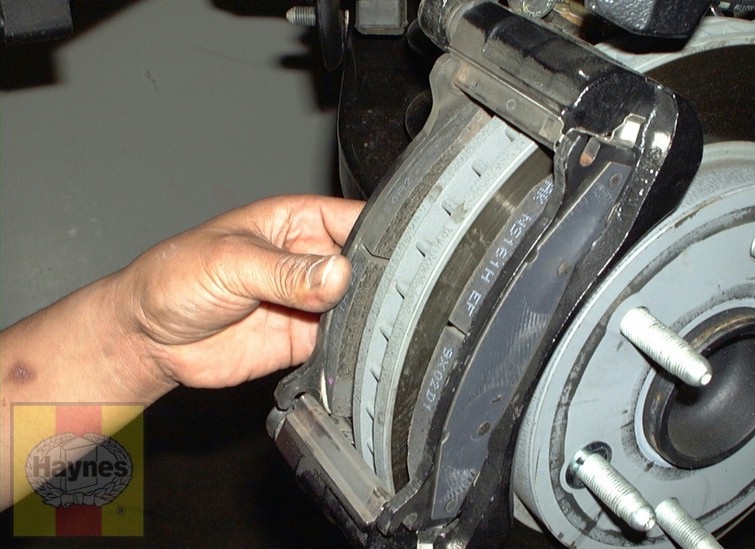
Illustration 3.5g - Remove the outer brake pad from the caliper mounting bracket.
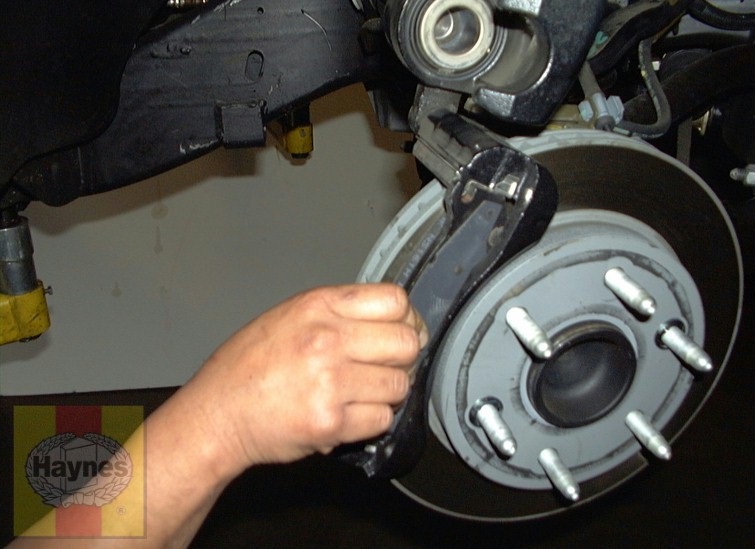
Illustration 3.5h - Remove the upper and lower pad retainers and clean them. If they are cracked or distorted, replace them. Clean the bracket-to-pad retainer mating surface with a stiff wire brush, then wipe it clean with a rag. Apply a thin film of high-temperature brake grease to the mating surface only.
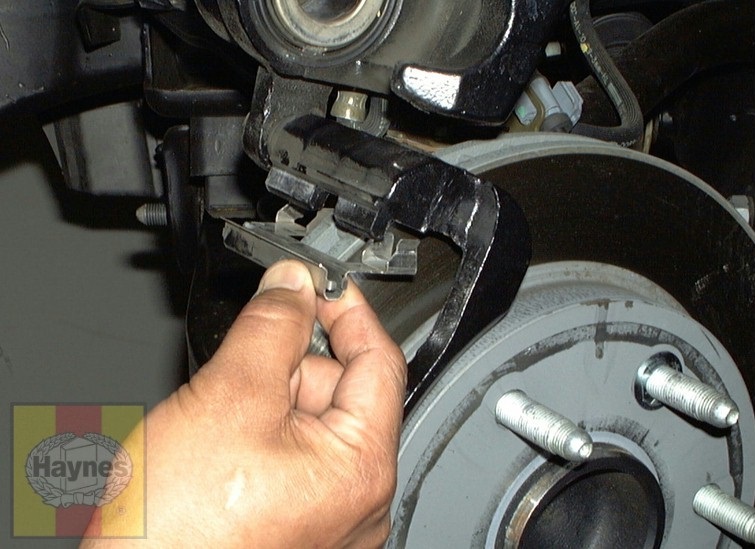
Illustration 3.5i - Install the upper and lower pad retainers on the caliper mounting bracket.
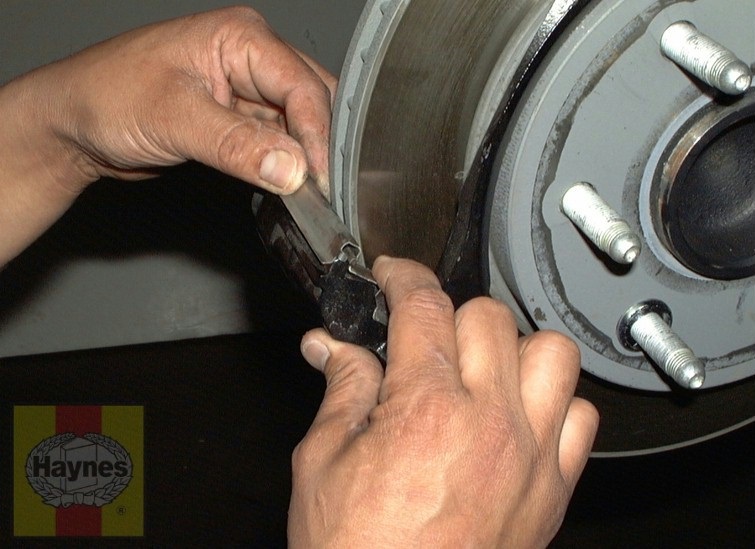
Illustration 3.5j - Install the inner brake pad into the caliper mounting bracket.

Illustration 3.5k - Install the outer brake pad into the caliper mounting bracket.
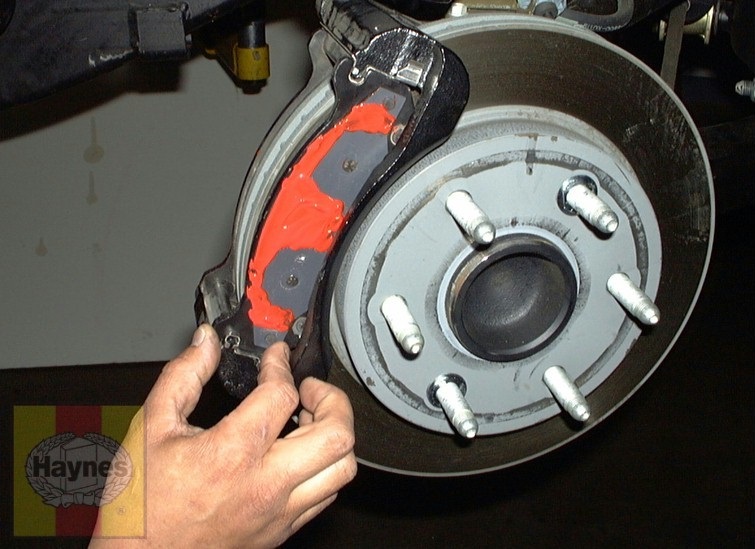
Illustration 3.5l - On 2500 and 3500 models, inspect the caliper mounting bolt/slide pin for scoring and corrosion, then lubricate it with high-temperature brake grease. If it was dry, remove the caliper mounting bracket, remove the upper mounting bolt/slide pin and lubricate it too.
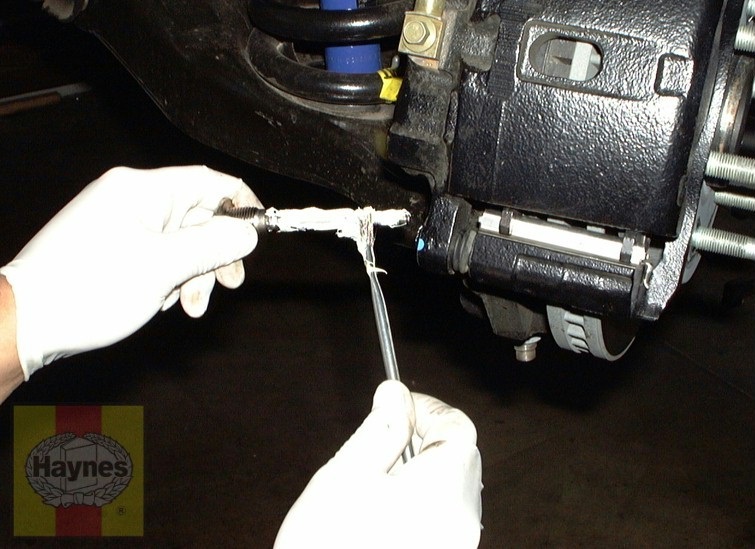
Illustration 3.5m - On 1500 models, before lowering the caliper over the pads, check the condition of the slide pin and the rubber boot, then lubricate the pin with high-temperature brake grease (if it was dry, pivot the caliper up again, pull the upper slide pin and boot out of the bracket and lubricate it, too)
- When reinstalling the caliper, be sure to tighten the slide pin bolts to the porper torque.
1500 front 74 ft-lbs rear 38 ft-lbs
2500/3500 front 80 ft-lbs rear 80 ft-lbs
Tighten the wheel lug nuts 140 ft-lbs
- After the job has been completed, slowly depress the brake pedal about two-thirds of its travel a few times until the pedal is firm. This will bring the pads into contact with the disc. Check the level of the brake fluid, adding some if necessary.
- Break in the new pads by making several low speed stops (from approximately 30 mph). Allow time in between each stop for the discs to cool. About twenty stops should be sufficient to break in the new pads.
- Confirm that the brakes are fully operational before resuming normal driving.
This video is a general overview of replacing the brake pads on the typical vehicle, based on several cars we've had at the shop. Much of it applies to the 2007-2017 Chevy/GMC trucks and SUVs, but it is meant merely as a supplement to the above instructions.
