Martynn Randall is technical editor at Haynes and has been with us for approaching 30 years. He's written more than 60 Haynes publications and has owned more than 85 cars and 60 motorbikes... so far!
Auxiliary. In the dictionary it means ‘supplementary’, ‘reserve’, ‘substitute’. All of which might lead you to think that it’s not exactly important – the until-the-end of-the-season manager, the B-side of a single. Only there to make up the numbers.
But where your car’s auxiliary drivebelt is concerned, that couldn’t be further from the truth. That’s because if the auxiliary belt decided to pack up, a whole load of systems will likely immediately pack up with it. These are systems such as the alternator, the air-conditioning system, the water pump, and the power steering. So, if the belt fails, you’ll end up hot and sweaty at the side of the road because your car’s battery has been flattened.
And not only that, but if a belt fails, it can do so rather violently, causing untold damage to expensive components throughout the engine bay. So, while you might think the auxiliary belt is secondary to your car’s health, it’s actually vital to your car’s ability to keep going.
It operates in some pretty extreme conditions, be that sub-zero temperatures in winter, searing heat at the height of summer (albeit that’s usually only for a couple of days), as well as continuing to function through biblical rain. That means it pays to keep an eye on it and look after it.

Inspecting your auxiliary belt
The good news is that an auxiliary belt (which can also be known as the serpentine belt, ancillary belt and accessory belt), is designed to last between 50,000 and 100,000 miles, and checking it out is usually pretty simple.
For a start, listen to it. If it’s become stretched and is slipping, it’ll emit a squealing noise when you start the engine, or when you turn on the air-conditioning.
It should be reasonably flexible – check that the tension is correct using your thumb to press on the belt mid-way between a couple of pulleys. It will deflect slightly but there shouldn't be a noticeable deformation and it should immediately take up the slack when you let go.
The belt should also be free from any cracks. But you need to know which cracks to look for. If you see small cracks across the ‘V’ ridges on the inside of the belt, this is fine. However, if you notice cracks running long the ‘V’ ridges, or if there are sections of the ‘V’ ridges missing, then it’s time to change the belt. And if you can change the belt yesterday, then all the better.

How to change your auxiliary belt
Most vehicles have a roughly similar way of swapping the auxiliary belt, although it can be tricky to access. On some cars, you can reach down through the engine bay to access the belt, while on others you might have to jack up the car, set it on an axle stand, remove a wheel and the wheelarch liner, none of which is particularly difficult to do.
After that, take a picture of the routing of the auxiliary belt, so you know how to position the new belt.
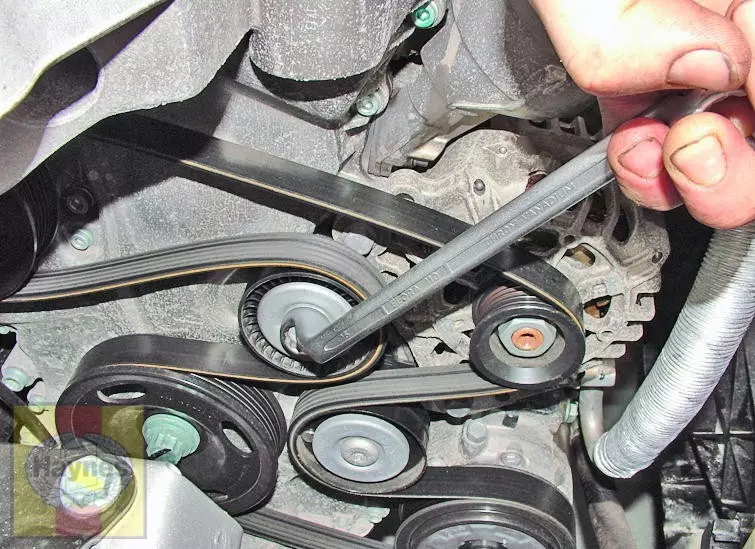
Then you’ll need to use a socket and ratchet to release the belt tensioner (and more often than not you can keep it in the ‘released’ position by inserting a small drill bit into it). The belt will now be loose, so remove it, then and fit the new one, making sure it runs around all the pulleys in the correct way. Then take up the tension in the tensioner using the socket and ratchet once more, remove the drill bit, and gently allow the tensioner to place tension on the new belt.
Job done, and you’ll be good for at least another 50,000 miles – as long as you check the new belt periodically.
Find out how much you’ll save by changing the aux belt yourself here
